8 Things to Check When Buying a Used Windows Laptop

8 Things to Check When Buying a Used Windows Laptop

8 Things to Check When Buying a Used Windows Laptop© Provided by HowToGeek

Quick Links
  • Test the Keyboard and Trackpad
  • Test the Speakers and Built-In Microphone
  • Test the Built-In Camera
  • Check the Health of Your Laptop Battery
  • Ensure the Laptop Isn’t Stolen
  • Perform the Physical Inspection
  • Test the Wired and Wireless Connectivity
  • Check the Health of RAM and Storage Drive

Buying a used laptop can indeed save you money, but it does come with some risks. This is why you should thoroughly examine the laptop before closing the deal to avoid unpleasant surprises later on. If you doubt the credibility of the seller, here’s how you can test the used laptop.

Test the Keyboard and Trackpad

Begin the laptop inspection by testing the keyboard and trackpad first. To test the keyboard, go to a keyboard testing website like Keyboard Tester and press each key from the first to the last. If all keys register correctly, the keyboard is likely in good condition. Also, make sure you feel comfortable typing on the keyboard.

To test the trackpad, hover over the screen to gauge its responsiveness. Then, experiment with different trackpad gestures, such as pinch-to-zoom and two-finger scroll, to see which ones are supported. If you have another laptop, you can compare trackpad responsiveness by conducting a touchpad accuracy test on both laptops using the No-Cursor website.

This will help you confirm whether the trackpad on your new laptop is equally or more responsive than the other one.

Test the Speakers and Built-In Microphone

Next, you should test the built-in microphone and speaker. While you can simply play and record something to check if the audio input and output devices are working fine, Windows also offers a way to test them in Settings. On Windows 11, right-click on the Start button and select “Settings.” Then, navigate to System > Sound.

To test the built-in speakers, click on “Speakers” under Output, which will open the sound settings. Here, click on the “Test” button next to Format. If you hear clear sound coming out of your laptop speaker without distortion or muffling, it’s working properly. If the audio output is unclear, there may be an issue.

To test the built-in microphone, return to the sound settings, click on “Microphone Array,” and then click on the “Start Test” button next to Test Your Microphone. Speak for a few seconds, then stop the test. If you see a decent volume percentage recorded, the microphone is working as it should.

Test the Built-In Camera

If you intend to use the laptop for video communication, test its built-in camera. To do this, type Camera in the Windows Search bar and open the Camera app.

If the camera app detects the webcam and the visuals are clear and of satisfactory quality, as the seller claimed, then the camera is working correctly.

Check the Health of Your Laptop Battery

The more a laptop is used, the more its battery capacity diminishes. When purchasing a new laptop, you should ensure that it’s not heavily worn out. You can check this by generating a battery health report on Windows. Open the Windows PowerShell utility as an administrator, enter the following command, and press Enter:

Posted in Uncategorized | Leave a comment

The reason so many laptops have moved to soldered RAM

Jacob Roach / Digital Trends

Jacob Roach / Digital Trends© Provided by Digital Trends

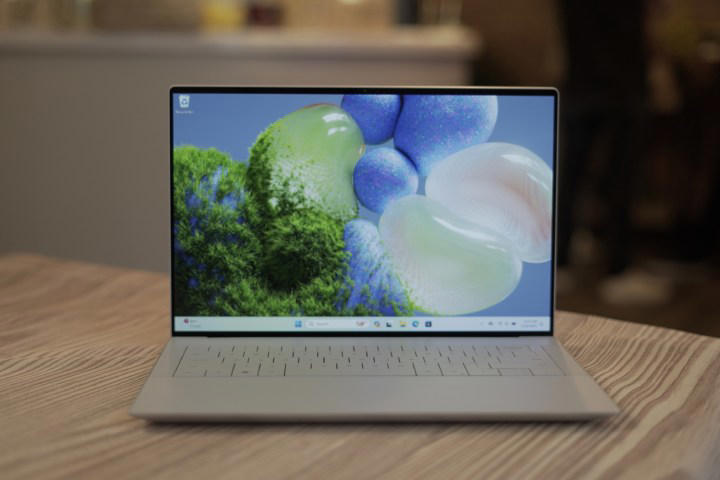
The completely redesigned Dell XPS 14 and 16 came out this year as two of the most divisive laptops in recent memory. No, it wasn’t just the capacitive touch buttons or invisible trackpad that caused an uproar — it also moved to soldered RAM. This was a big change from the past, where the XPS 15 and 17 were both celebrated for their upgradability.

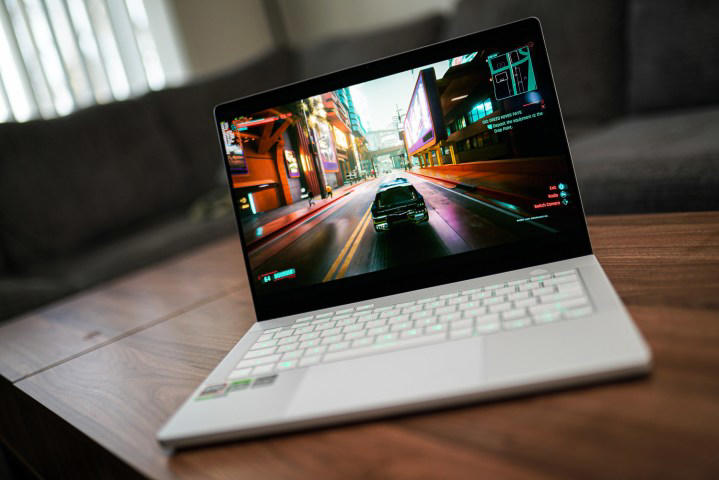
Of course, Dell isn’t the first to make the transition. In fact, they’re one of the last, which is what makes the decision so much tougher to swallow. Where soldered RAM was previously limited to just MacBooks and ultrabooks, it’s now affecting most high-performance laptops for gaming as well. Even the fantastic ROG Zephyrus G14 moved to soldered memory this year.

So, why do these companies keep moving in this direction? Is there any validity to their claims about better performance or allowing for a thinner chassis? I spoke with many of the major laptop manufacturers to seek out some answers.

What is soldered RAM and why should you care about it?

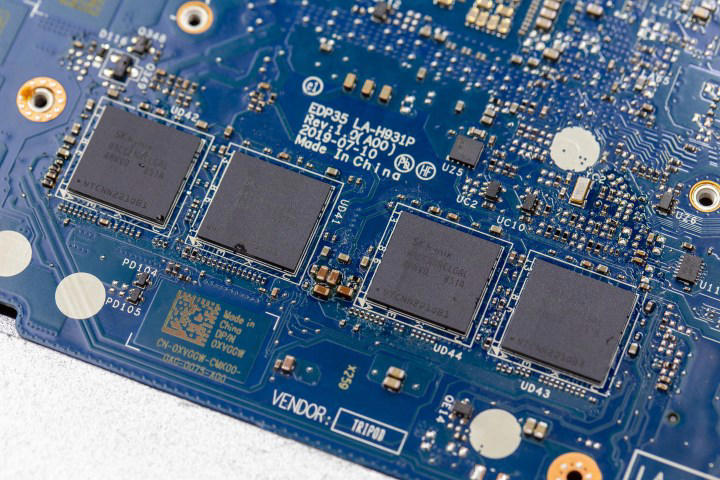
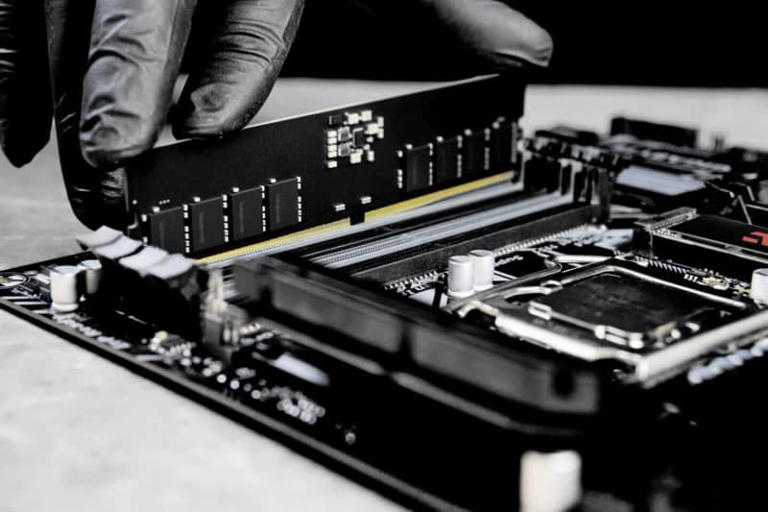
First, some background. The term “soldered RAM” refers to a type of computer memory that is permanently attached or soldered onto a laptop’s motherboard. Needless to say, that makes it impossible to upgrade, or even repair.

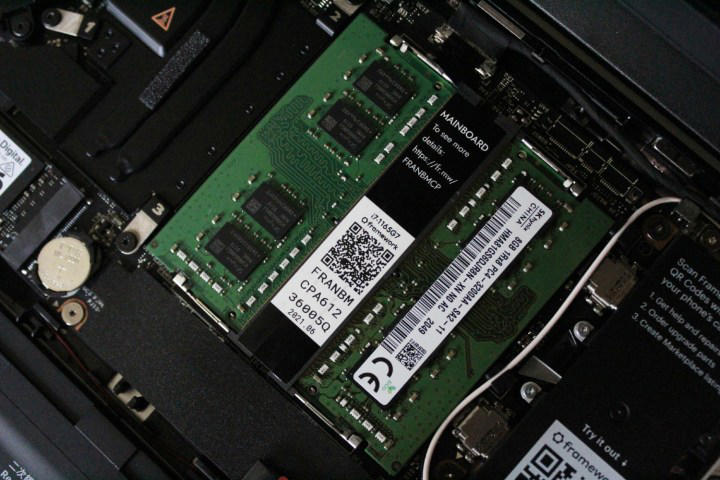
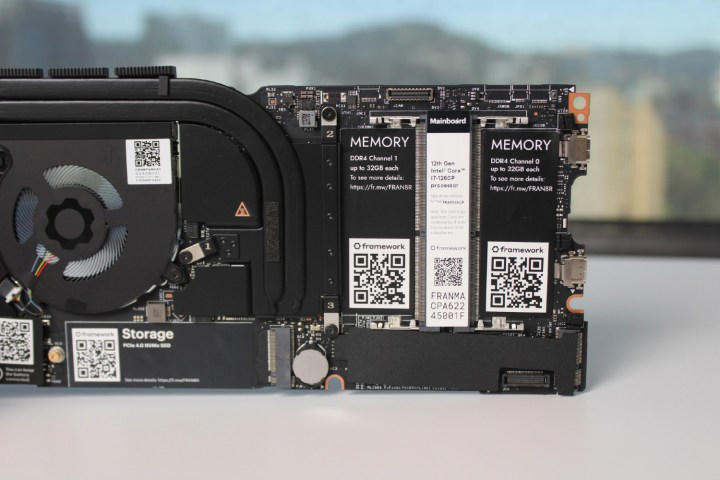
Laptops generally either come with all of the RAM soldered onto the motherboard or with traditional RAM sticks that slot into the board and can be removed or replaced. The latter is referred to as small outline dual in-line memory modules (SO-DIMMs). However, some laptops these days may feature a mix of the two, with some RAM permanently soldered and an empty slot that allows for upgradeability.

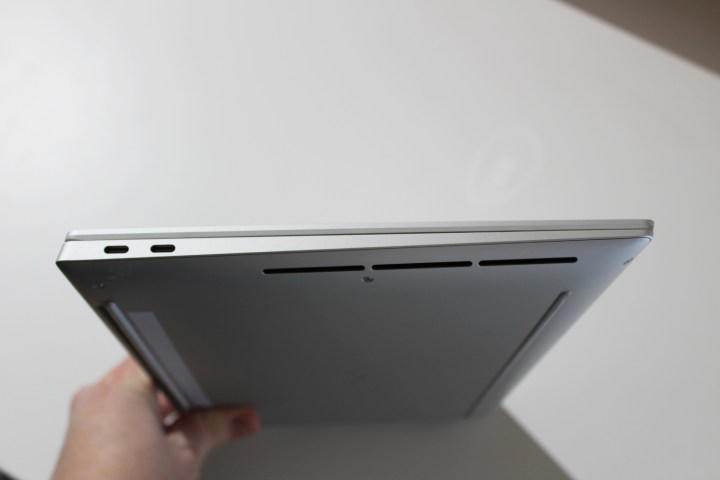
It’s not all bad. Whether we’re talking about thin and light productivity laptops, budget notebooks made for casual use, or high-end gaming beasts, they’re all trying to save space, prolong battery life, and optimize cooling. Using soldered RAM can be one of those space-saving techniques that enable manufacturers to create even thinner laptops, and all three of the companies I spoke to about this confirmed that.

Fullscreen button

Luke Larsen / Digital Trends

Luke Larsen / Digital Trends© Provided by Digital Trends

While laptop manufacturers generally seem to like soldered RAM, not all end-users are onboard. The reason why enthusiasts across various forums and Reddit communities aren’t happy with the rise in soldered RAM is that it directly affects the value of the laptop that you’re buying. It makes the laptop’s memory impossible to upgrade in the future, and the repairs get trickier.

For some people, this isn’t a problem. Electronics, computers included, have never had shorter lifespans than they do now, and laptops are one of the things that get replaced every few years. Most users think of buying a new laptop before they ever think of wanting more RAM. After all, new graphics cards and processors come out every single year, enticing consumers to go ahead and replace their existing laptops with something newer and better. However, for power users, the lack of upgradeability is increasingly becoming a problem.

Why are laptop makers subjecting us to this? If you’d ask Reddit, they’d tell you it’s planned obsolescence, but is that all there is to it?

Despite spending over two months working on this article, I still feel like the topic of soldered RAM versus socketed options remains unexplored. Each type exists in its own niche, and now, there’s a lot of migration between one niche and the other where there wasn’t much before. We’re now seeing soldered RAM in gaming laptops, whereas previously we’d only see it in productivity machines.

Is this trend going to stick around? Most likely, although it’s hard to predict to what extent. One thing is clear, though — there are tangible benefits to companies using soldered RAM, and all the people I spoke to while writing this agree that they outweigh the downsides, but how that applies to the end-user is a bit more complicated.

What makes soldered RAM popular?

Fullscreen button

Greg Davill

Greg Davill© Provided by Digital Trends

To find out what’s so great about soldered RAM, I spoke to Haval Othman, who is a senior director of experience engineering at HP. Othman made it clear that there are situations where he and his team would prefer to use soldered RAM, but it’s not a go-to solution for everything. “The main two reasons I could think about from all the strategic decision-making to using soldered RAM or socket RAM are the thermals, the efficiency, and the form factor,” Othman said.

Let’s break this down a little bit.

It saves space

If there’s one thing and one thing only that soldered RAM is indisputably good for, it’s saving space. Othman explained the benefits, saying: “If battery life, mobility, form factor (thin and light), and power efficiency are my priority among other design choices, then my mind immediately goes to soldered RAM; because that’s where soldered RAM can be beneficial and power-efficient, which will lead to longer battery life. Plus, it’s going to give me more space on the motherboard, so I can design the product thinner and lighter. […] If we want a thin product, the trade-off is soldering more of the devices onto the board.”

This tracks. In a laptop, there’s only so much space that can be used for components, and that free space grows smaller by the year to make ultrabooks possible. They’re an industrywide trend that was first popularized by Apple, and the rest of the laptop manufacturing world quickly caught on. Each year, laptops are released thinner and lighter, and that means having to squeeze the components together in new, innovative ways.

Apple’s way of getting around this was to start using its own system-on-a-chip (SoC) that integrates the CPU, the GPU, and the memory into a single chip. Other companies have to make do in different ways, and this is probably one of the biggest reasons behind soldered RAM.

Soldering the memory down onto the motherboard means that it can be attached almost anywhere within the laptop instead of being slotted into a specific part of it. It effectively makes the laptop thinner by cutting back on the space that the RAM module takes up. The space saved by soldering memory can be used for other things, such as a bigger battery.

It’s cheaper and easier to produce — or is it?

Not only are soldered modules much thinner, but rumor has it that they’re also easier to put together. With a RAM slot and a memory stick, you’d need an engineer to work on each laptop as it comes off the assembly line. Soldered parts don’t need that much human supervision and can be produced entirely by machines. Let’s not forget that they’re cheaper all on their own, without even considering the manpower required — they use fewer parts.

“It actually costs more to put a socket on the board than it does to solder RAM onto the board. On the other hand, of course, you can make one board and do different RAM configurations if it’s socketed. So it’s always a trade-off. As we plan these products, there are trade-offs every step of the way,” said Othman, confirming my suspicions.

It’s hard to say how much this affects the decision to use soldered RAM, though. All three companies that I spoke to stress the form factor much more than any tangible cost benefits. Tom Schnell, senior distinguished engineer of Dell Client Solutions Group, notes that this doesn’t make much of a difference. “There is no effect on manufacturing as the DRAM packages are standard. There is no impact on the retail price of our laptops,” Schnell said.

Stuart Gill, director of global media relations, campaigns, and corporate content for Lenovo, agreed with that: “Both soldered and socketed RAM designs are now quite mature. As a result, we see no impact on the manufacturing process and, therefore, the cost to the consumer.”

It seems that, although beneficial to the manufacturing process, the cost and the ease of production don’t play a big part in companies choosing soldered RAM.

It can be faster and more efficient

Fullscreen button

Luke Larsen / Digital Trends

Luke Larsen / Digital Trends© Provided by Digital Trends

Modern laptops often use low-power DDR memory (LPDDR) as opposed to the DDR4 or DDR5 we see in desktops. These power-saving modules are a good deal for laptops, as they can help prolong battery life, but they’re always soldered. Another bonus stems from the thermal efficiency, as thoughtful placement of soldered RAM can make for a more streamlined mainboard design, optimizing the component layout. Lastly, some processors have higher frequency caps for LPDDR memory than they do for socketed RAM, with Meteor Lake maxing out at LPDDR5/X-7467 and just DDR5-5600.

As a result, it’s no wonder that many sources praise soldered memory for its performance. HP’s take on this is that bandwidth plays a part. “There’s also the issue of the bandwidth of the memory. On an SO-DIMM, it’s relatively limited bandwidth; while when you solder the memory chips onto the board, you can build it for a much wider bandwidth. And with things like the modern chips with the AI processors and things like that, that memory bandwidth is really important — so that’s part of the performance story and part of the requirement that makes soldered memory something that you almost need compared to socketed memory.”

This makes sense given that this type of memory is still more prevalent in productivity laptops, which are also more likely to benefit from things like the neural processing unit (NPU) found on the latest Intel Meteor Lake CPUs.

Dell’s Tom Schnell weighed in on the matter by saying, “Soldered RAM can achieve good performance because it does not require a connector or secondary PCB (printed circuit board), and because the total signal channel length can be shorter. However, the design is still limited by the best speed of the RAM and overall memory architecture.”

Schnell explained that this performance boost might not ever make any difference to consumers. “An increase in bus speed can have a 3-5% system performance improvement, but that improvement may not be noticeable at a customer level because system memory may not be the key limiter in system performance. For example, if the storage SSD is the system bottleneck, then a small improvement in memory performance won’t matter.” Schnell also noted that battery life isn’t as big a factor as some make it out to be: “There is minimal impact on power efficiency.”

It’s more durable, but …

This may not come as a surprise, but soldered RAM tends to be more durable than SO-DIMMs. Everything is fitted nicely and neatly, not to mention that it’s stuck to the motherboard for all of eternity. There are no moving parts, and the same cannot be said about RAM sticks that go into a particular slot.

Othman notes that HP has been happy with the stress tests it performed on its laptops. “In all our tests that I have seen for durabilities, they have a very high rate of success because of [the RAM being] fully integrated with the motherboard. But that’s not been the major strategic decision-making point for using soldered RAM versus socketed RAM.”

There’s a pretty high price to pay for this durability, though. If something does happen to soldered RAM, the repairability is … limited, to say the least.

The dark side of soldered RAM

Fullscreen button

Luke Larsen / Digital Trends

Luke Larsen / Digital Trends© Provided by Digital Trends

With all of the perks of soldered RAM I just talked about above, you might be scratching your head and wondering why people are even complaining. Well, it’s not all as peachy as that, unfortunately, and those complaints are valid.

There are some glaring downsides to using soldered RAM. Laptop manufacturers can get away with them, because hey, for many users it just doesn’t matter. However, for those who care, the laptop market is slowly becoming a minefield where they have to dodge all the laptops that come with soldered components, including RAM and storage.

So, what’s so bad about soldered RAM?

For starters, the lack of upgradeability. This is not a problem for many laptop owners, but for those who notice an otherwise decent laptop start to run into memory issues, not being able to upgrade their laptop memory from 8GB to 16GB or 16GB to 32GB can be an obstacle. HP is aware that this can be a problem for some of its customers — namely, for gamers.

“Now, the other problem where you’re going to hear complaints is the upgradeability. Gamers in general want to be able to change and customize everything. But then, if you’re aiming for the thin and light, and the mobility, that’s where you need to go,” Othman said. He then noted HP’s Omen Transcend 14, the type of device that targets student gamers who value the thin-and-light form factor over upgradeability.

The next potential issue is the ability to repair the notebook. If the RAM module is soldered and it fails, there often isn’t much that can be done about it. As it’s permanently attached to the motherboard, the typical repair process involves replacing the entire motherboard — and that can cost a pretty penny.

Othman told me that HP hasn’t dealt with any cases of repairability problems caused specifically by soldered RAM. However, he also admitted: “If the issue is specifically [related to soldered RAM]; if someone has a burned RAM for example, in that case, the repairability will be much more difficult for the companies to do. It won’t be straightforward like with socketed RAM.”

If the laptop is still covered by warranty, swapping the entire motherboard isn’t going to be a problem. However, once that time’s up, you’re looking at some costly repairs.

Those are the two major problems, but they lead to smaller nuisances. For instance, having to decide about memory capacity at the time of purchase isn’t ideal for many. If you wanted to buy a laptop right now, you’d be faced with a choice. You’d either have to avoid models with soldered RAM entirely — which isn’t always easy, as this often isn’t listed on the spec sheet — or you’d have to spend extra to future-proof your device and get enough RAM right away.

Fullscreen button

Luke Larsen / Digital Trends

Luke Larsen / Digital Trends© Provided by Digital Trends

This is one of those things that lends some legitimacy to the whole “planned obsolescence” theory. Laptop makers are allowed to charge extra on models with more RAM; an upgrade from 16GB to 32GB can often cost between $100 and $300, depending on the model. With upgradeable RAM slots, users can just buy a couple of SO-DIMM sticks for as low as $80 for 32GB. Having no option to upgrade means either switching to a different manufacturer or accepting the price of the model with more memory.

It’s not ideal, and it’s not consumer-friendly — but it’s the reality of the laptop market right now.

Is soldered RAM bad?

Fullscreen button

Digital Trends

Digital Trends© Provided by Digital Trends

If you’re wondering whether soldered RAM is bad, and if you should avoid it the next time you buy a laptop, I’ll let you in on a secret: There’s no universal answer to that question.

Soldered RAM is pretty bad if you care about upgradeability. If you want to buy a laptop that will last you years, and you want to have the option to improve it as time passes, models that come with their memory perma-attached just aren’t for you. If you don’t mind it, however, there’s little to no reason to avoid it, but be prepared that if something does go wrong, costly repairs will be on the horizon.

This might be why the outcry on websites like Reddit has been so loud lately. After all, some of the previously top-shelf gaming laptops have now made the stealthy switch to soldered RAM, and many users aren’t happy.

As I mentioned at the beginning, the 2024 Dell XPS lineup comes to mind. Everything is soldered in Dell’s new laptops, meaning that you can say bye-bye to upgradeability and repairs. Even the excellent Asus ROG Zephyrus G14 comes with soldered memory, which puts it at a disadvantage when compared to laptops like the Razer Blade 14.

For now, I think that the main problem that I personally have with soldered RAM is that outside of pushing for thinner and lighter laptops, there’s little to no benefit to customers. Despite trying to find out why exactly this type of memory is becoming more prevalent in laptops that may not be becoming thinner, I’m still unsure. I get that it’s the only way to make laptops thinner — but if the notebook is still the same size from one generation to the next, only the RAM is now soldered, what did we gain? If the performance benefits aren’t massive, was it ever worth it for the end-user? Doesn’t feel like it.

The good news is that SO-DIMM memory might eventually be replaced by the CAMM2 standard. Recently approved by JEDEC, CAMM2 is said to be significantly thinner, and it’ll be available both in soldered and non-soldered variants. Using CAMM2 will allow laptops to stack up to 128GB of RAM, and the frequencies are said to be going up, too. CAMM2 can also activate dual-channel memory with just a single module.

When I spoke to Dell, Tom Schnell shared my hopes for CAMM2 being a good solution to this dilemma: “This is a big reason why Dell brought CAMM to the JEDEC standards body in 2023 — to solve for performance memory ceiling limits with SO-DIMM while also being a modular design. ”

It’s too early to tell, but it does sound like CAMM2 memory might solve just about every issue with SO-DIMM, allowing for thinner laptops and — hopefully — a return to upgradeability. But until then, all you can do is wait and look into some of the few upgradeable laptops still left if this is an important factor to you.

Posted in Uncategorized | Leave a comment

Microsoft’s fixed search with its latest update

(Image credit: Microsoft)

(Image credit: Microsoft)© Microsoft

Windows 10 has received a new optional update and it comes with some much-needed fixing to cure problems some users have been experiencing with the search function in the OS.

Windows Latest noticed that in the latest preview update just released for Windows 10 (KB5036979), there’s been some work to improve the search functionality.

Microsoft tells us that: “This update makes some changes to Windows Search. It is now more reliable, and it is easier to find an app after you install it. This update also gives you a personalized app search experience.”

As Windows Latest describes, for some Windows 10 users, search has become a somewhat hit or miss affair particularly around trying to quickly fire up an app. Such as, for example, searching for the ‘Recycle Bin’ and not getting the icon for that returned, but other functions instead.

On social media, there have been a number of reports about wonky search experiences, too, such as this one on Reddit where Windows 10 refused to find a commonly-used app.

In more extreme cases, search is locking up and crashing, which is the pinnacle of irritation for this part of the UI.

Analysis: Wait a little longer

Hopefully, this kind of behavior should be a thing of the past when this update is applied. However, note that this is just an optional update at this point, so it’s officially still in testing – meaning there’s a slight chance the fix may not be fully working. Or that the KB5036979 update might cause unwelcome side-effects elsewhere in Windows 10 (it wouldn’t be the first time, certainly).

The safest bet is to wait it out, let early adopters test this preview update, and install the finished cumulative update when it arrives in May (on Patch Tuesday, which will be May 14).

At least we know this piece of smoothing over is now incoming, so those who’ve been frustrated with iffy search results now know that – with any luck – their woes should soon be over. Or at least, they’ll face spanners in the search works with less regularity.

Elsewhere with this update, Microsoft has also improved the reliability of widgets on the lock screen, with a more “customized experience” and more visuals available, so these should be better all-round, too.

The downside with KB5036979? That’s a new initiative to introduce notifications about your Microsoft Account in the Start menu and Settings app, which will doubtless consist of various prompts to sign up for an account, or to finish that process.

Posted in Uncategorized | Leave a comment

Qualcomm Accused of Faking Benchmarks for Its Snapdragon X Elite and Plus SoCs

Snapdragon X Elite

Snapdragon X Elite© Provided by ExtremeTech

Credit: Qualcomm

Fullscreen button

Snapdragon X Elite

Snapdragon X Elite© Qualcomm

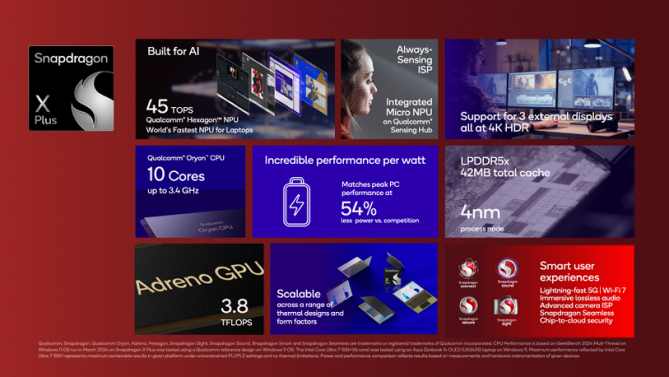
Qualcomm has been generating a lot of hype for its upcoming Snapdragon X Elite and Plus CPUs for Windows. As the first competitive Arm-based processors for Windows, the chip giant’s forthcoming CPUs promise to deliver the same power and efficiency that Apple has become famous for with its M-series SoCs to Windows users. However, according to a muckraking analyst, Qualcomm is not honest with its performance numbers, a claim that Qualcomm now says is false.

The site Semiaccurate published the bombshell piece about Qualcomm’s Snapdragon SoCs yesterday, igniting a firestorm of controversy and speculation throughout the tech world. The heart of the controversy is performance claims made by Qualcomm for its X Elite and X Plus SoCs, the latter of which was announced yesterday. Both SoCs are claimed to offer far superior performance to every other mobile CPU, and the benchmarks provided to the media so far have mostly backed up these claims. It’s also allowed media to run benchmarks, but only pre-selected tests, in a controlled environment, on its own machines.

Fullscreen button

Snapdragon X Plus

Snapdragon X Plus© Provided by ExtremeTech

Adding to the mystery is Qualcomm has published specs and performance numbers without much clarity about how it was arriving at some of these numbers. Credit: Qualcomm

However, Semiaccurate says these benchmark numbers are cooked and that none of Qualcomm’s OEM partners have been able to replicate them on their systems. The site says its sources for this claim are two “Tier 1” OEMs (Dell, HP, Lenovo) and “other sources.” The site said that when OEMs got their own samples to test, their performance was about 50% lower than the numbers in Qualcomm’s technical documentation. Qualcomm blamed the discrepancy on inferior cooling and benchmarks not native to Arm. However, after time passed, more OEMs with considerable engineering talent reported findings similar to Semiaccurate’s findings, leading the site to conclude something was rotten in Denmark.

Qualcomm has denied the claims in a statement to Tom’s Hardware. “We stand behind our performance claims and are excited for consumers to get their hands on Snapdragon X Elite and X Plus devices soon,” said a spokesperson for Qualcomm. This boilerplate statement doesn’t address any of the underlying claims by Semiaccurate, but we suppose it’ll all come out in the wash eventually. Microsoft is expected to reveal the first Snapdragon X Elite/Plus hardware at its Build conference next month, hopefully allowing the press to test it on its own so we can get to the bottom of this situation.

Posted in Uncategorized | Leave a comment

What Is A DP Cable, And Is It Different From HDMI?

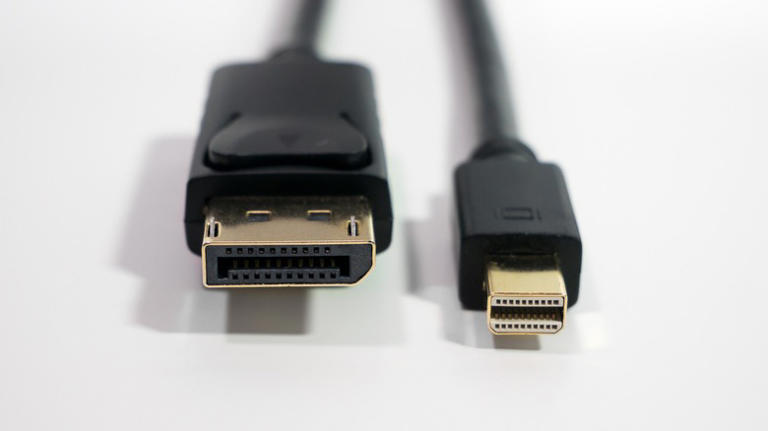
dp and mini dp cables

dp and mini dp cables© Barry Paterson/Shutterstock

Some of the most popular cables today include DP and HDMI cables. But what exactly is the difference between the two, and is one better than the other? First of all, DP stands for DisplayPort, while HDMI means High-Definition Media Interface. Both types of cables connect technology, like computers and gaming consoles, to other devices like monitors and TVs. Both DisplayPort and HDMI cables facilitate the transfer of audio and video from one device to another. However, the ways these cables work and their capabilities differ slightly.

DP cables were designed to replace the older DVI, LVDS, and VGA cables that dominated the tech industry during the ’80s, ’90s, and early 2000s. DisplayPort cables are more complex and provide a series of improvements when compared to older cable types. Some of the major benefits of a DP cable include compatibility with high-resolution monitors, the ability to send both audio and video through a single cable, and support high refresh rates, resulting in a crisper images.

DisplayPort cables work similar to Ethernet cables because of the way they send data packets between devices. This feature allows DP cables to be highly efficient and makes them ideal for high-speed computers. While computers are the most common application for DP cables, they’re also used for DVD players, Blu-Ray players, and gaming consoles. That said, remember that DP cables do not support Ethernet and cannot be used to connect devices to the Internet.

How Are DP Cables Different From HDMI Cables?

Fullscreen button

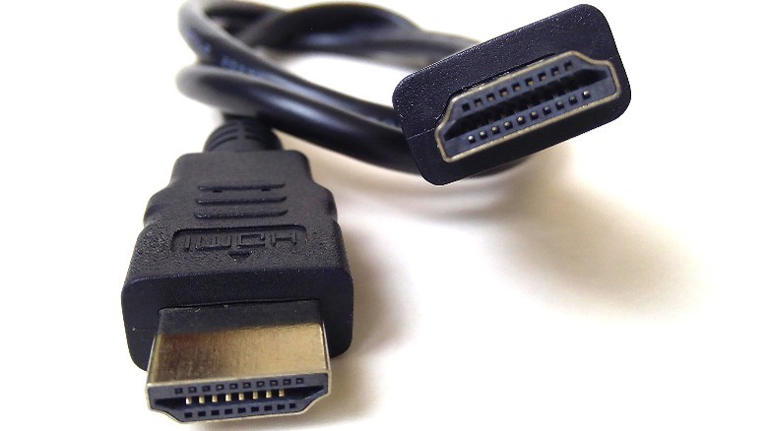
hdmi cable

hdmi cable© TaweePhoto/Shutterstock

HDMI cables are also used to send video and audio between two devices but are often more versatile than DP cables. The HDMI creators intended for the cable to function as a universal tool for connecting devices, serving as a one-size-fits-all solution for connecting devices. Since then, the HDMI cable has become ubiquitous in the tech world. While the most common applications for HDMI cables include connecting devices like gaming consoles, TVs, Blu-Ray players, computers, and monitors. The cable’s uses are so vast, you can even find them in automotive and commercial applications.

HDMI cables are available in various types, styles, and capabilities. Basic HDMI cables can transmit audio and video at resolutions up to 1080i and at speeds up to 5 gigabits per second. Some HDMI cables are designed for high speeds and resolutions up to 8K, while others are built specifically for automotive use and feature reinforced heat shielding to protect them from harsh conditions and high engine temperatures.

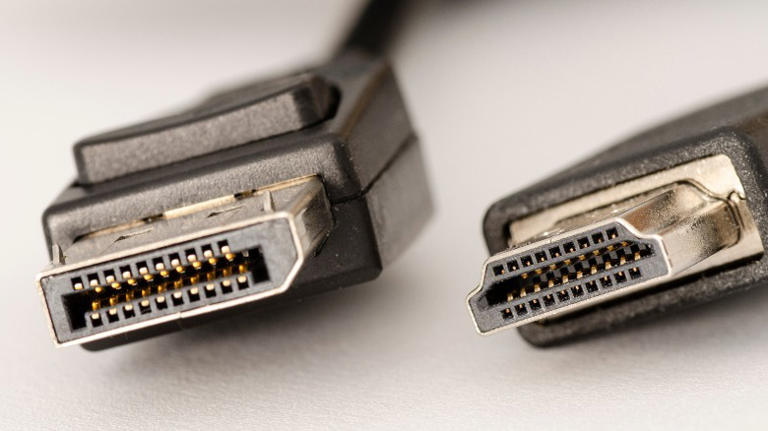
In contrast, there are two types of DisplayPort cables: standard and DisplayPort 2.1. The cables also come in standard and Mini DisplayPort sizes. DisplayPort 2.1 is the more modern version, capable of higher bandwidth levels and compatible with advanced monitors and displays. The standard connections are irregular in shape, while the mini versions look similar to Thunderbolt cables. Regardless, both standard and mini DP cables have 20 pins and the same capabilities.

DP Vs. HDMI: Which Should You Buy?

Fullscreen button

dp and hdmi cables

dp and hdmi cables© jverdut/Shutterstock

Whether you need a DisplayPort or an HDMI cable depends mainly on what you’re connecting. DP cables are most frequently found in high-end computer setups, particularly gaming computer setups. This is partially due to DisplayPort’s compatibility with both Nvidia’s G-SYNC and AMD’s FreeSync. It also helps that DP cables are ideal for multi-monitor setups, like those favored by gamers and streamers.

HDMI cables, on the other hand, are more versatile but limited in other ways. These cables support AMD’s FreeSync technology but aren’t compatible with Nvidia’s G-SYNC. However, HDMI cables feature many capabilities that DP cables don’t. Most new HDMI cables support built-in Ethernet, allowing users to connect devices to the Internet without extra connections. Furthermore, HDMI cables provide CEC support, meaning they can transmit and control audio signals using a remote. That feature makes HDMI cables the preferred choice for audio and home entertainment systems. Finally, HDMI cables may be ideal for situations requiring more length. DP cables are designed to function optimally at lengths under 3 meters, while HDMI cables don’t have a specified ideal length.

Generally, DisplayPort cables are the better choice for high-speed gaming PCs or Nvidia graphics card users, while HDMI is ideal for connecting various technologies like TVs, gaming consoles, or media players. That said, these cables share many features, and there are numerous situations where both are appropriate. Remember, do your own research and check devices to determine which cable connections are supported.

Posted in Uncategorized | Leave a comment

How to set up Windows Sandbox on Windows 11

  • What is Windows Sandbox?
  • What you need to run Windows Sandbox
  • How to set up Windows Sandbox

If you follow news around Windows 11 (and Windows 10 before it), you might have heard of Windows Sandbox, but there’s a good chance you may also not know what it is. This is a feature Microsoft added in later versions of Windows 10, specifically for the Pro or Enterprise editions.

Essentially, Windows Sandbox gives you a safe, isolated environment to test software in, very much like using a virtual machine, but even simpler to use. If you’re wondering how to set up Windows Sandbox on Windows 11, we’re here to help with that.

Fullscreen button

Window with light shining through and Windows 11 text

Window with light shining through and Windows 11 text© Provided by XDA Developers

Related

Windows 11: Everything you need to know

Windows 11 is the latest and greatest operating system from Microsoft, and it packs a ton of changes. Here’s what you need to know.

What is Windows Sandbox?

Windows Sandbox is a feature introduced with Windows 10 version 1903, and it has been a part of Windows ever since. It’s only available for Pro and Enterprise editions, however, so there’s a good chance your PC doesn’t support it. However, there’s third-party software like Sandboxie that achieves a similar purpose.

Windows Sandbox relies on virtualization technology similar to using a VM to create an isolated environment for you to test software in. This can be downloading a potentially dangerous piece of software or testing your own software that you’re developing, which might cause issues with your system.

Unlike a traditional VM, however, Windows Sandbox doesn’t require much work on your part. Everything is set up automatically, and the operating system inside Windows Sandbox is the same one you’re currently using. It’s just a clean copy of your operating system, which is isolated from the rest of your files so everything stays safe. While it’s not as versatile as setting up a VM with whatever settings you want, Windows Sandbox is extremely easy to use.

What you need to run Windows Sandbox

Setting up Windows Sandbox is extremely easy, but there are some things you’ll need to check first. Your PC’s processor needs to support virtualization, and that feature needs to be enabled in the BIOS. To check this, follow these steps:

1. Right-click the Start menu icon (or press Windows + X on your keyboard), and then choose Windows Terminal (Admin) from the menu. Note: In more recent versions such as Windows 11 version 22H2, this option is just called Terminal (Admin).

2. Type systeminfo.exe in the Windows Terminal window and hit Enter.

3. Near the bottom of the Windows, check the Hyper-V requirements section and make sure all the requirements say Yes.

If you see a message saying “A hypervisor has been detected. Features required for Hyper-V will not be displayed”, it means you likely have some kind of virtualization technology installed. It may be that Hyper-V is already enabled, or your PC has some form of virtualization-based protection, which is common in business devices. This shouldn’t stop you from using Windows Sandbox.

4. If you see that the Virtualization Enabled in Firmware option says No, you’ll need to head into your BIOS settings to enable it.

5. To do this, go to the Start menu and hold Shift on your keyboard while clicking Restart.

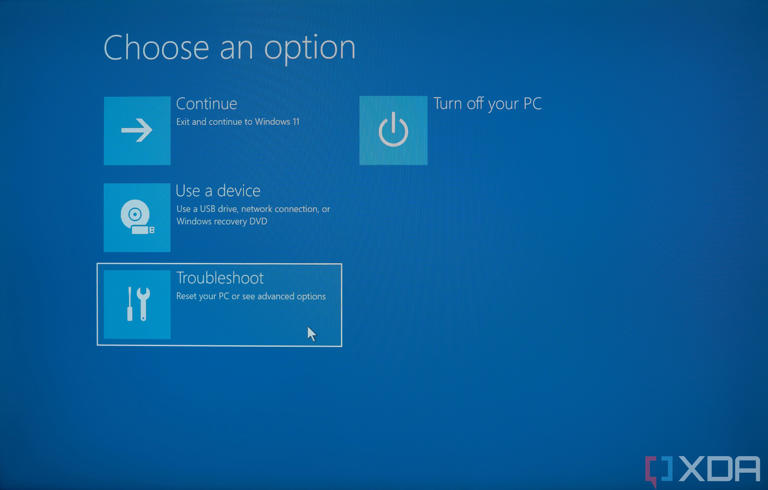
6. When the computer restarts, choose Troubleshoot, followed by Advanced options.

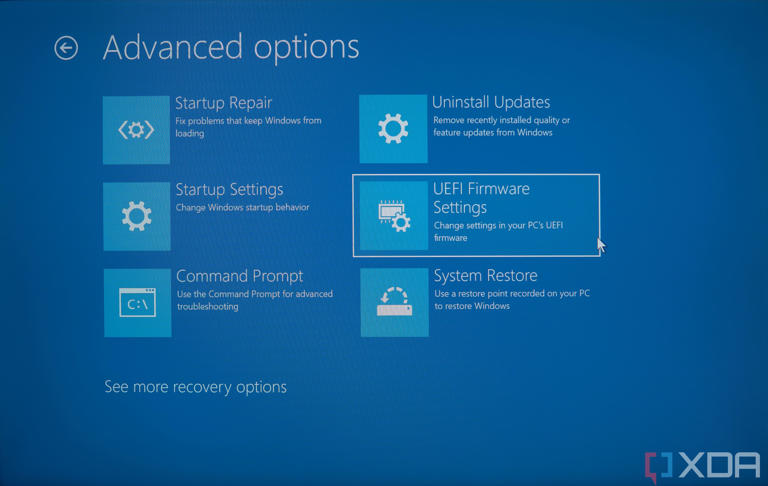
7. Click UEFI Firmware settings.

Fullscreen button

Screenshot of the Windows recovery environment with the Troubleshoot option selected

Screenshot of the Windows recovery environment with the Troubleshoot option selected© Provided by XDA Developers

Fullscreen button

Screenshot of the Windows recovery environment with the UEFI Firmware Settings option selected

Screenshot of the Windows recovery environment with the UEFI Firmware Settings option selected© Provided by XDA Developers

Close

8. This part will look significantly different based on what PC you have, but you’ll want to look for a setting that mentions virtualization. This is usually under the advanced settings in your BIOS.

9. Enable the setting if it isn’t already, then save the changes and exit.

10. You should now be able to set up Windows Sandbox

How to set up Windows Sandbox

Aside from making sure your PC is easy to run it, setting up Windows Sandbox is actually incredibly easy. Here’s what you need to do:

1. Open the Start menu and enter optionalfeatures.exe, then hit Enter.

2. Scroll down until you find the Windows Sandbox option, then check the box next to it.

3. Click OK and wait for the components to install. Restart your computer when prompted.

4. Windows Sandbox should now show up as an app in your Start menu

Windows Sandbox is one of the best features in Windows 11 Pro

That’s about all there is to setting up Windows Sandbox, and it’s a pretty painless process for how useful it is. This feature makes it super easy to test software without risking harm to your PC and without having to go any complicated setup steps. It’s arguably one of the best reasons to get Windows 11 Pro over Home.

1:18

Fullscreen button

Posted in Uncategorized | Leave a comment

Here’s the Difference Between a Modem and a Router

Image: Teerasan Phutthigorn (Shutterstock)

Image: Teerasan Phutthigorn (Shutterstock)© Image: Teerasan Phutthigorn (Shutterstock)

Setting up your home internet connection is a lot easier than it used to be, but that doesn’t mean it’s self-explanatory. Terms like “modem” and “router” are often thrown around, sometimes interchangeably, even though they’re very different devices. Before you go out and buy what you need to connect your devices to the web, you’ll need to understand the difference between a modem and a router.

What does a modem do?

The best way to think of the modem, a blend of “modulator” and “demodulator,” is to imagine it as the door to the internet. Just like you can’t enter or exit your home without a door, you can’t access the internet without a modem to create that connection.

A modem translates the data from your ISP (your internet service provider) to your home network, and it translates whatever data you create on your home network to the internet. For example, when you clicked this article’s link, your modem sent the request to your ISP, who, in turn, passed the request along to the servers this article is hosted on. Those servers confirmed the request, and returned it back to your ISP, who, once again, returned it to your modem, finally connecting your device with this article. 

In the early internet days, most folks only used modems to connect to the internet. And, if you’re just connecting your devices via ethernet cables, you can get away with running only a modem in your home. But if you want your home to have wifi, so you can connect to the internet wirelessly, you’ll need a router.

What is a router?

Think of the router as an intersection for your home network. All of your devices—such as your smartphone, TV, computer, and game console—connect to your router. The data those devices send to the router is transferred to the modem, so only the router directly connects to the modem. From there, the modem takes all those requests and translates them so they can connect to the internet.

Wireless routers often feature both hardwired connections and wireless ones (wifi). That means you can connect a multitude of different devices to the router, all without having to worry about the more limited connections that your modem might offer. Wired connections can be faster and more secure, while wireless ones offer convenience. (You don’t have to be directly next to the router in order to connect to the internet.)

If you live in a small space, or your wifi demands are light, a standard router might be enough to connect all your devices to, wirelessly or not. However, for large homes and spaces, a mesh router might be the way to go, which uses a system of multiple routers to “piggy back” off each other and boost the available wifi signal throughout your home.

Gateway, the modem/router combo unit

You don’t actually have to buy your modem and router separately. Instead, you can buy a modem and router combo unit, often called gateways, which makes the entire process a little bit easier. These gateways are usually what internet companies offer when you join their service, but some still offer separate modems and routers in their set ups.

How do I choose the right router or modem?

The first thing you need to take into account is speed. Modems and routers are designed to provide specific speed capabilities to your home network. So, if you buy a modem or router that doesn’t offer support for the speeds your network offers (check with your internet service provider for that information) you could end up bottlenecking your home connection, forcing it to run slower than it normally should.

Let’s say your plan with your ISP offers connections of up to 1 Gbps. You’ll want to make sure your modem and router can handle that. If they only advertise speeds of up to 500 Mbps, for example, you’re not taking full advantage of your connection. However, if your network is capped at 300 Mbps, that 500 Mbps modem or router would be just fine. 

Routers and modems will often feature a confusing name that actually denotes their speed. The first two characters indicate what wifi generation their compatible with. AC means Wi-Fi 5, while AX means Wi-Fi 6 or Wi-Fi 6E. The number following these characters denotes the total speeds offered by the bands (often 2.4 GHz and 5 GHz), so you shouldn’t expect the router to be able to deliver those speeds for every device on every connection. The Netgear Nighthawk AX2400, for example, is Wi-Fi 6-compatible (AX) and has a top combined speed of 2,400 Mbps.

While this knowledge is great for quickly identifying a device’s speeds, you’ll also see this information in its specs, so just take a closer look at those when making your decision. You’ll also see other information, such as top wired speeds, maximum signal range, and whether the device is compatible with a mesh system.

Finally, make sure your ISP allows you to buy your own modem in the first place. If they don’t, you’ll need to rely on theirs anyway.


Posted in Uncategorized | Leave a comment

Hub vs Router vs Switch – What’s the Difference?

Hub vs Router vs Switch – What's the Difference?

Hub vs Router vs Switch – What’s the Difference?© Provided by AllTheThings.Best

Are you confused about the difference between a hub, a router, and a switch? You’re not alone! These networking devices may seem similar, but they serve different purposes and play distinct roles in your home or office network. In this post, we’ll break down the differences between these three devices and help you understand their functions, benefits, and limitations. Whether you’re a tech enthusiast or just curious about networking, this post will give you a clear understanding of hubs, routers, and switches, and help you make an informed decision for your network setup. So, let’s dive in and unravel the mysteries of hub vs router vs switch!

Hub vs Router vs Switch – What are they?

When it comes to networking devices, it can be easy to get confused with all the different terms and functions. In this article, we’ll break down the differences between a hub, a router, and a switch, helping you understand their unique roles in a network.

But before we get started with that, let’s talk about what a network is. A network is a set of computers of some sort ( be it a laptop, cell phone, or game console ) that are all connected by a computer network and able to communicate. That’s it, that’s all a network is. there are various types of networks, but we’re not going to be diving that deep today.

What is a Network Hub?

A hub, also known as a network hub, is the most basic networking device. It works by broadcasting data packets to all devices connected to it. However, a hub does not have the ability to analyze or filter the data it receives. This means that any traffic on the hub gets sent to ALL devices that are connected to the hub, no matter if the traffic is for them or not. This isn’t necessarily ideal, since all of that extra traffic can cause your network to slow down much like the extra cars during rush hour on the freeway slows it down.

What is a Network Switch?

A switch is a device that connects multiple devices within a network. Unlike a hub, a switch can analyze the data it receives and direct it only to the specific device that needs it. This makes switches more efficient and less prone to slow networks due to congestion. Switches are commonly used in local area networks (LANs) to connect computers, printers, and other devices.

What is a Router?

A router is a device that routes network traffic between multiple networks. Most home routers also perform double duty as network switches, routing traffic within a network to the appropriate device. Routers can also provide additional features like assigning network addresses ( DHCP ), hosting Wifi, or providing network security, bandwidth management, and firewall protection.

So, which one do I want?

When it comes to setting up a computer network, understanding the differences between a hub, a router, and a switch is essential. Each of these devices plays a crucial role in managing and directing network traffic, but they have distinct functionalities.

Use a Router if:

You should use a router if you are connecting to your internet service provider (ISP) through a modem or other non-router device. You would also want a router if you are planning on having multiple sub-networks on your network and want to be able to control the flow of traffic on them.

A router isn’t necessary for having automatic network addresses ( DHCP ), hosting Wifi, setting up network firewalls, or traffic filtering. There are dedicated devices that can manage each of these tasks. However, for most homes using a router for these services is sufficient and having a dedicated device would be overkill and unneeded additional maintenance.

Use a Switch if:

If you need to add more devices into your network, but your router is out of ethernet ports ( network ports ) you would want to use a switch to extend your network. Switches work great as an addition on a network that already has a router. This lets the router handle the heavy lifting of assigning and managing IP’s and routing tables, while the switch helps convey traffic.

Use a Hub if:

Network hubs have generally fallen out of use, especially in home networks. That said, there are a few use cases for them still. If your router is out of ports and you need more, and you only have a hub on hand, by all means use it. Since network hubs forward all traffic to all devices connected to it, they can be excellent for sniffing your network traffic to determine who is sending what where. In general though, go for a switch over a network hub.

FAQ

Are hubs, routers, and switches compatible with different operating systems?

Yes, hubs, routers, and switches are all compatible with different operating systems. These devices mainly deal with the network infrastructure and communication between devices, rather than the specific operating system running on those devices. Whether you are using Windows, Mac, Linux, or any other operating system, you can connect your devices to a hub, router, or switch without any compatibility issues.

What are the cost differences between hubs, routers, and switches?

The cost differences between hubs, routers, and switches can vary depending on the specific models and features. Generally, hubs are the most affordable option as they simply transmit data to all connected devices without any intelligence to direct traffic. Switches, on the other hand, are more advanced and can analyze data packets to efficiently send them to the intended destination, making them slightly more expensive than hubs. Routers, being the most sophisticated option, not only direct traffic within a local network but also between different networks, such as connecting your home network to the internet. As a result, routers tend to be the most expensive among the three. However, it’s important to consider your specific networking needs and choose the device that aligns with them while keeping your budget in mind.

In Summary

Thank you so much for taking the time to read this blog post about Hubs vs Routers vs Switches. I hope that this article has provided you with a better understanding of the three devices and helped you determine which one you need for your network. Understanding the differences between these networking devices is crucial for anyone looking to set up or troubleshoot their home or office network.

Posted in Uncategorized | Leave a comment

5 Ways To Customize Windows 11 Just For You

Microsoft logo colors with heart

Microsoft logo colors with heart© travelarium.ph/Shutterstock

Like most people, you probably find yourself in front of your PC for the better part of the day, whether it’s to put the final touches on a school presentation video or wrap up a business report due next Tuesday. With you spending that much time on your computer, it’s easy to grow weary of its monotonous appearance. After all, the standard, out-of-the-box settings lack personality and can feel stale after a while.

However, there’s no need to settle for this uninspired setup. Windows comes with a variety of underutilized features specifically for customization, letting you tweak your desktop environment to better suit your needs and style. Beyond what’s available within the operating system itself, you also have a host of third-party software at your disposal that offers even more ways to give life to your boring setup. We’ll walk you through five customizations you can do to transform your Windows PC from default to personalized.

Change Your Lock Screen And Desktop Images

Fullscreen button

changing background in Windows

changing background in Windows© Marinel Sigue/SlashGear

While Microsoft does come with some interesting photos, moving beyond those default desktop images can really make your PC feel more like your own. Here’s a quick guide on changing your lock screen image:

  1. Navigate to Settings > Personalization > Lock screen.
  2. Click the drop-down menu next to “Personalize your lock screen.”
  3. Choose your new lock screen image:
    1. Picture: If you want to use a single photo. Click the “Browse photos” button and select an image from your files.
    2. Slideshow: If you want to use a series of photos. Hit Browse to add your own folder. Scroll down to “Advanced slideshow settings” and tweak the slideshow options to your liking.

To change your desktop background, on the other hand, you have two options:

  1. From the Settings:
    1. Head over to Settings > Personalization > Background.
    2. Expand the drop-down menu next to “Personalize your background.”
    3. Pick your background style:
      1. Picture: To use only one photo. Click “Browse photos” to select your image of choice. Then, decide how the photo fits on your desktop (fill, fit, stretch, tile, center, or span).
      2. Slideshow: To use more than one image. Choose your folder from the local storage, and adjust the slideshow settings like picture duration, shuffle, and picture fit.
      3. Solid color: To use your favorite color as the background image. Pick your color from the preset options or click View colors to add a custom color (select one from the color picker or type your color’s HEX code).
    4. Using WinDynamicDesktop (to get dynamic images that automatically change at certain times of the day):
      1. Install and open WinDynamicDesktop from the Microsoft Store.
      2. Set your sunrise and sunset times using manual location entry, Windows location services, or your custom times.
      3. Pick your theme from the preloaded themes on the app or download one online.

Set Your Colors

Fullscreen button

changing colors in Windows

changing colors in Windows© Marinel Sigue/SlashGear

Unless your favorite color is blue, you might find Microsoft’s default accent color a little boring. The good news is that you can change this accent color to match your vibe. Follow these steps to do so:

  1. Open Settings from the Start menu.
  2. Go to Personalization > Colors.
  3. Expand the drop-down menu for “Choose your mode” to select how your PC and apps appear (Dark, Light, or Custom). If you opt for Custom, you can specify different modes for Windows and your apps.
  4. Turn the Transparency effects on or off depending on your preference. Turning it on will make windows and surfaces look translucent instead of a solid color.
  5. Set the Accent color to Manual.
  6. Do one of the following:
    1. Choose your color from the preset options under Window colors.
    2. To set your own color, click on View colors next to Custom colors. Use the color picker to find your color, or click More to enter HEX or RGB codes. Hit Done to apply.
  7. (Optional) Turn on “Show accent color on Start and taskbar” and “Show accent color on title bars and window borders.”

If you want to set a different color for your Windows elements, there are several apps you can install for free from the Microsoft Store. One is TaskbarEffectLT, which allows you to change the color of your taskbar. There’s also RainbowFrame that can set your window borders to display a running rainbow effect or a solid color of your choosing.

Customize Your Mouse Cursor

Fullscreen button

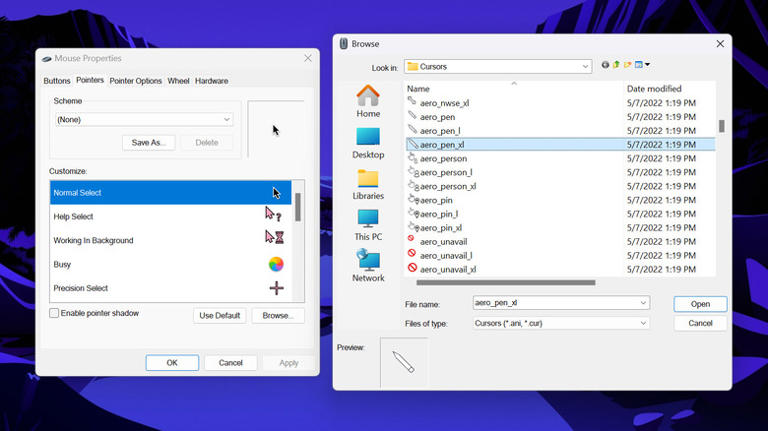
Mouse Properties dialog box in Windows

Mouse Properties dialog box in Windows© Marinel Sigue/SlashGear

Switching up your mouse cursor is a simple yet effective way to inject some personality into your PC. After all, it’s your one constant companion, whether it’s boldly clicking away on your screen or quietly lurking in the shadows and waiting to be summoned. There are a few ways you can customize your cursor.

  1. From the Settings:
    1. Access the mouse pointer settings from Settings > Accessibility > Mouse pointer and touch.
    2. Pick your mouse pointer style from the three preset options or click on Custom > Choose another color to set a custom color for your mouse.
  2. Using cursor apps:
    1. If the built-in options aren’t to your liking, you can also apps like Custom Cursor, Aesthetic Desktop Themes, and Custom Cute Cursors. They offer varied cursor designs, although you may need to subscribe or buy the packs. After installing your app of choice on your PC, simply select your favorite cursor icon from the app and apply it.
  3. For custom or downloaded cursor sets:
    1. Aside from cursor apps, you have the option to create your own Windows cursor sets or download one online. To use these cursor sets:
      1. Place your custom-made .cur files into the C: > Windows > Cursors directory. If you’ve downloaded a cursor set, unzip it and install it on your PC.
      2. Head over to Settings > Bluetooth & devices > Mouse > Additional mouse settings.
      3. In the Mouse Properties dialog box, switch to the Pointers tab.
      4. Double-click on Normal Select under Customize.
      5. Pick your new cursor. Installed cursor sets will appear in their own folder.
      6. Repeat the process for other cursor actions as needed.
      7. Hit Apply and OK to save your new cursor look.

Add A Desktop Widget

Fullscreen button

desktop widgets on Windows

desktop widgets on Windows© Marinel Sigue/SlashGear

Tired of the same old desktop view filled with folders and app icons? If you want to give your setup a fresher look that’s still very functional, consider adding desktop widgets. Unlike the Windows widgets that you can only access via Win + W, desktop widgets remain visible on your desktop to provide you with quick information at a glance. Here are some of the tools you can use to customize your desktop with widgets:

  • Rainmeter: This is an open-source software that lets you display practically anything on your desktop through the so-called skins. You can use the app by itself as it comes with a preloaded skin for basics like clocks, disk space availability, and network details (IP address and upload and download speeds). However, if you’re looking for more functionality and design, third-party skins like Omnimo, catppuccin, and MontereyRainmeter are readily available for download.
  • ScreenStyler: This is also a free app that helps customize your desktop with ease. To add a widget to your desktop, simply drag and drop it onto your desktop. You can further tweak the widgets’ color, size, corner radius, and labels to fit your aesthetic. Aside from widgets, ScreenStyler also lets you change your app icons and wallpaper.
  • BeWidgets: A Microsoft Store app offering a collection of widgets. It features varied widgets like time, date, weather, photos, and app shortcuts, which you can further customize (change size, visibility, position, and even font style).
  • Widget Box: Another Microsoft Store app with a set of widgets to choose from. It comes with a stopwatch, battery usage with the current time, daily horoscope, air quality, and a music player.

Revamp The Taskbar’s Look

Fullscreen button

segmented Windows taskbar

segmented Windows taskbar© Marinel Sigue/SlashGear

The taskbar, with all its app shortcuts and utilities, is something you access multiple times a day. Given its visibility, it only makes sense to spice it up with some customizations. Here’s how you can tweak your taskbar to better reflect your style:

  1. Unpin/pin things to the taskbar. To pin an app, search for the app from the Start Menu, right-click on the app, and select Pin to taskbar. To unpin an app, right-click on the app from your taskbar and select Unpin from taskbar. You can also clean your taskbar by removing other unwanted items (Search, Copilot, Task view, and Widgets) from Settings > Personalization > Taskbar.
  2. Turn your taskbar into a dock using StartAllBack.
    1. Install and launch the app on your computer.
    2. Go to the Taskbar tab.
    3. Under Tweak behavior and superpowers, turn on the Segments and set it to “Up to three segments” if you want to display the system tray or “Just central segment” if you only want to show the dock.
    4. (Optional) Adjust the other settings in the Taskbar tab, such as the icon size, icon margins, taskbar location, and the Start menu icon design.
  3. Make the taskbar transparent. While there’s already a translucent option in Settings (Settings > Personalization > Colors > Transparency effects), you might want to make your taskbar fully transparent. From the StartAllBack app, go to the Advanced tab. Then, check the option for “Use custom taskbar coloring.” Click on the raindrop icon and select Clear. Finally, drag the color slider to 0 for full transparency.
Posted in Uncategorized | Leave a comment

PC memory gets faster, safer with new DDR5 standard

PC memory gets faster, safer with new DDR5 standard

PC memory gets faster, safer with new DDR5 standard© PC World

As CPU makers push microprocessors even faster, a PC’s memory must keep up as well. JEDEC, a key chip standards body, has responded by issuing a new DDR5 memory standard that pushes speeds up to 8800Mbps.

Put another way, that means that PC memory speeds will increase from DDR5-6800 to DDR5-8800, eventually. Memory makers as well as PC processor vendors will have to support the new standard, and modules will have to be manufactured and tested. But the official announcement means that the clock has started.

The new specification is officially known as JESD79-5C.

There’s another wrinkle: the inclusion of Per-Row Activation Counting (PRAC), a feature of the new specification. “PRAC precisely counts DRAM activations on a wordline granularity,” the release says. “When PRAC-enabled DRAM detects an excessive number of activations, it alerts the system to pause traffic and to designate time for mitigative measures.”

This appears to be a security measure, designed to counteract a type of memory hack known as “Rowhammer.” As the name suggests, Rowhammer attacks repeatedly access, or “hammer,” a row of transistors on a memory chip. Over time, the persistent attacks could cause a transistor on a nearby row to flip. Theoretically, at least, that could lead to the otherwise protected memory leaking data. Anandtech suspects that PRAC is there to help mitigate Rowhammer attacks, and that’s probably right.

It appears that PRAC allows the “hammered” memory to cool down, in effect, which could help stop Rowhammer attacks in the future. It’s not an attack PC users typically have to worry about, but it’s one that could help keep your cloud data safe.

Posted in Uncategorized | Leave a comment